Self-Service is your tool for managing student finances. Below are instructions for the most common tasks for which students and proxies use Self-Service. If you have additional questions, do not hesitate to contact One Stop.
Web Browser Settings
Google Chrome is the preferred web browser. The following settings will ensure that all features of Self-Service are available to the user.
1. Allow pop‐up windows.
-
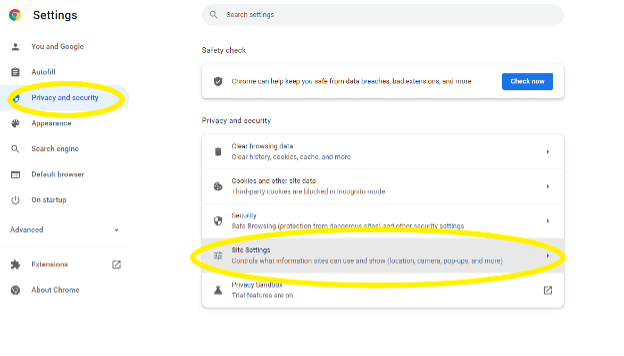
In Google Chrome, click on the three vertical dots on the far‐right side of the browser window. This will open a menu of options, click Settings (third up from the bottom).
![]()
-
On the Settings page, under Security and Privacy, click Site Settings
-
On the site menu, under Content, click on Pop-ups and redirects
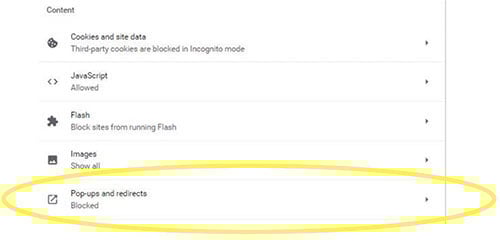
On the Pop-ups and redirects menu, next to Allowed to send pop-ups and use redirects click Add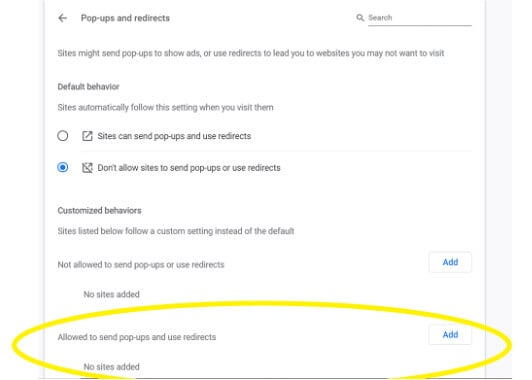
On the Add a site pop-up enter https://secure.touchnet.net/ and click Add.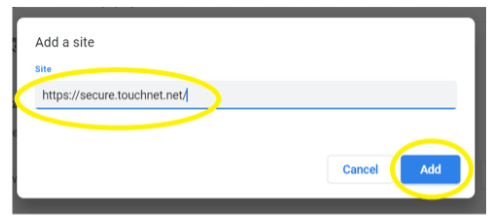
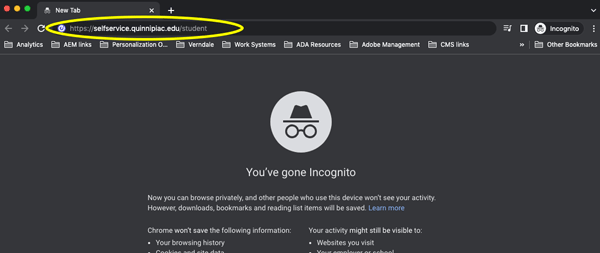
2. To avoid clearing cache and cookies every time logging into Self-Service, open a new incognito window.
-
Click on three vertical dots on the far-right side of the browser window, this will open a menu of options, click New Incognito window (third option down). This will automatically open a new window

-
Browse to Self-Service in the URL bar: https://selfservice.quinnipiac.edu/student
All students can grant their parent, guardian, spouse or authorized person access to a proxy version of Self-Service, which enables the proxy user to access academic and/or financial information for the student. As such, the proxy will have access to view grades, account activity and student statements as well as make online payments and set up payment plans on behalf of the student. Additionally, by granting proxy access, Quinnipiac University will email both students and authorized proxy users regarding important billing information.
To authorize a proxy user the student must:
-
Ensure their web settings are working according to the Web Browser Settings section of this guide.
-
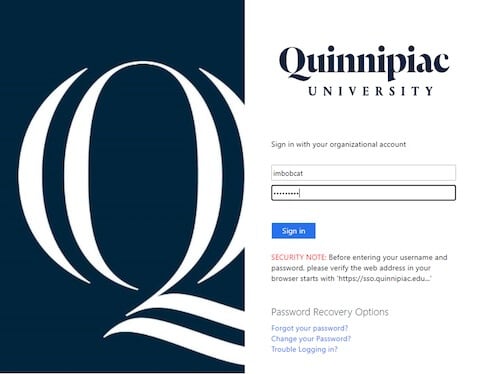
Log into Self-Service with QU Credentials
-
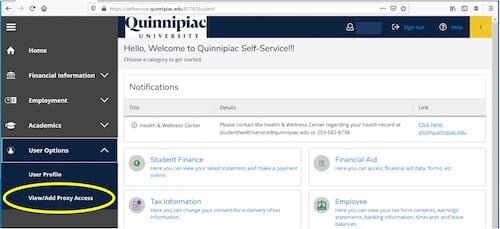
Select User Options from the menu and click View/Add Proxy Access
-
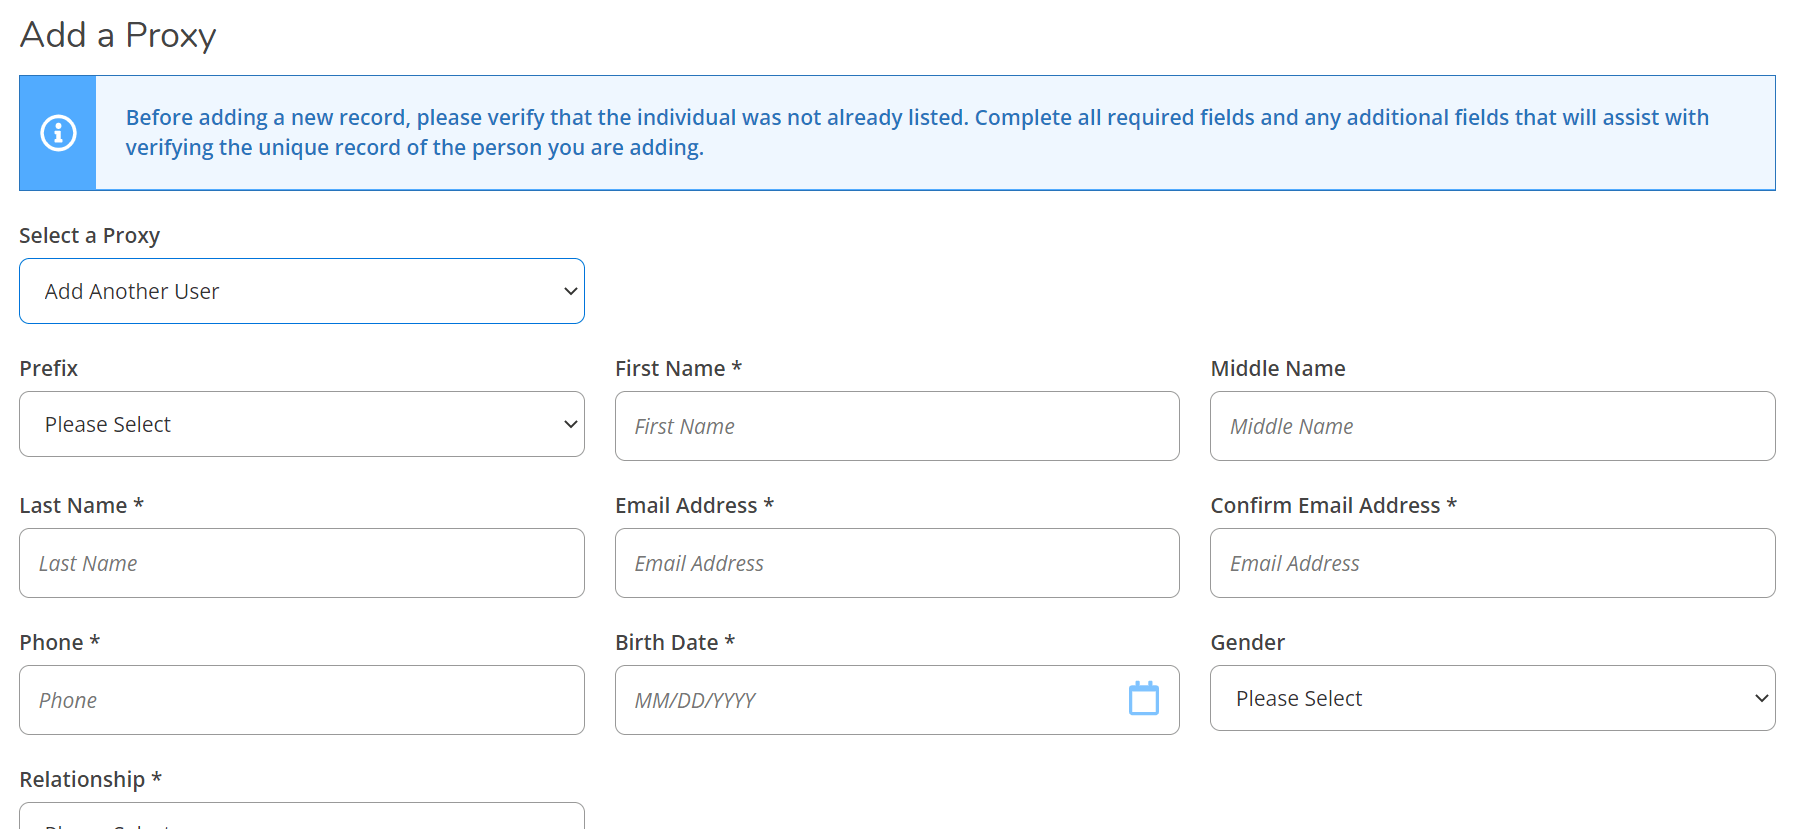
Use the drop down under Select a Proxy to choose a current relationship or select Add Another User.
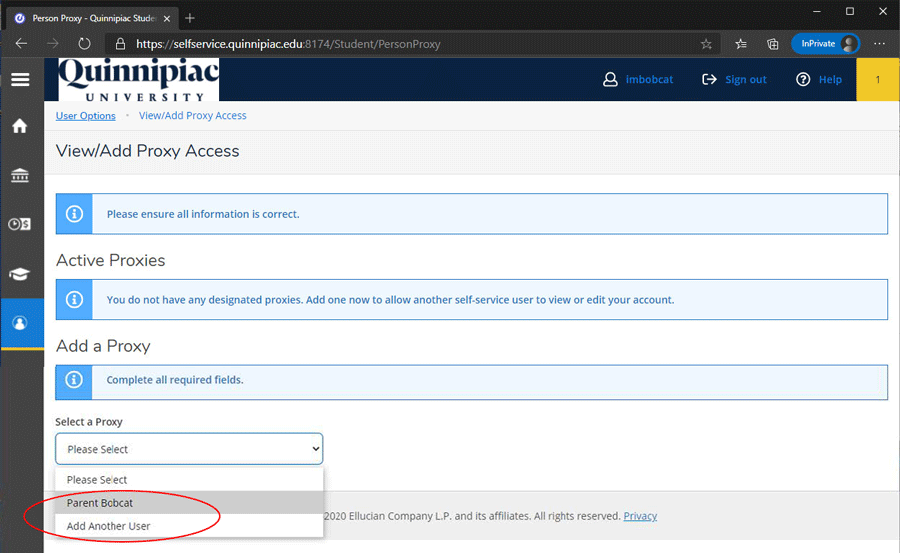
-
After electing to Add Another User, complete the required fields with the proxy user’s information.
-
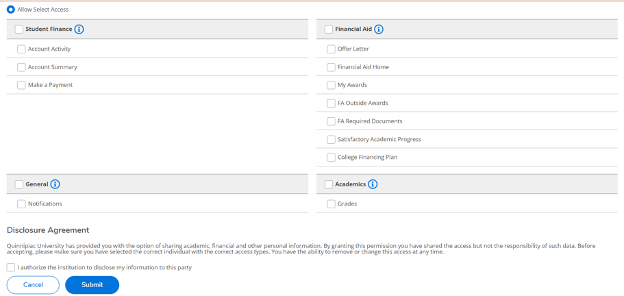
Whether updating a current relationship or adding a new user, select the type of access to be granted (Allow Complete Access will grant all or individual areas can be selected). Please note: To grant access to account activity, view a student statement, and make a payment, make sure that all boxes associated with Student Finance are checked. Under Disclosure Agreement, check the box to authorize the institution to disclose your information to the other party. That individual will receive an email containing access credentials.
-
At any time, the student may edit the privileges of their proxies by clicking on the pencil and editing access. Access may also be taken away completely.

Note: If a student adds a new user and that record is not unique (matches another record QU has on file) our team will review that request and take appropriate action. Please ask the proxy to follow the First-Time Login Proxy Users procedures in their entirety to complete the proxy creation process.
Students may authorize a proxy (parent, guardian, spouse or other individual) to have access to Self-Service to make payments on behalf of the student. This should be done at a time when both the student and the proxy can complete the process as access may expire after a few days. Full instructions for how students add a proxy are available at qu.edu/proxy. Once complete, the proxy will receive emails. The proxy user should log into Self-Service and set up a permanent password. The process below describes the steps for the first login for the proxy. Subsequent to this setup the proxy can simply login to Self-Service.
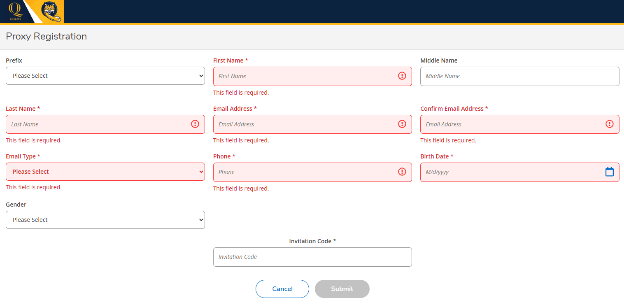
- Depending on a variety of factors the proxy may receive an email with the subject “Here is a proxy user invitation…” If received go to the link provided in the email. Enter the requested demographic information. Enter the invitation code found in the email at the bottom of the page. Select Submit. If the Submit is dimmed please ensure that all fields are completed and click on the white space of the page. Once completed, the proxy’s Self-Service login credentials will be generated and sent to the proxy’s email. If the invitation is not received the proxy may go directly to step 2.
- The new proxy user will receive two email messages -- one with the subject “We are pleased to notify you that you now have access…” that includes the proxy’s username and a second with the subject, “Here is the password for your new account…” and includes a temporary password. The username begins with “PA” followed by seven digits and then @quinnipiac.edu. Example: pa#######@quinnipiac.edu
- Log into Self-Service with the new username (beginning with PA) and temporary password that was received via email.
- The proxy will be prompted to set up a new password. When entering username, please be sure to include “@quinnipiac.edu” after the username.
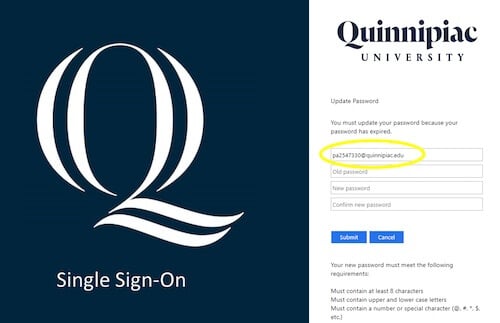
- Once the new password is set, re-enter the password to log in:
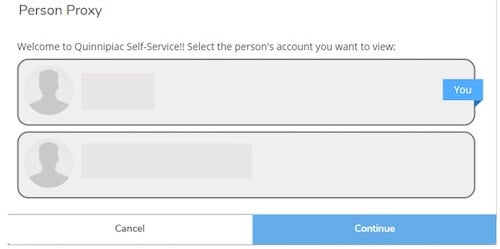
- Select the student’s name to proxy on their behalf.
(If the proxy accidentally selects their own name, click the username at the top right of the screen to switch.)
- Once logged into Self-Service as a proxy user, the proxy will see a green bar at the top of the screen. The proxy will now be able to access the student’s information, based on the permissions granted by the student.
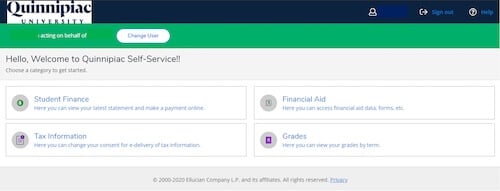
- Even if you are not ready to make a payment please perform the following steps to set up your proxy account upon the first login. Click on Student Finance to see account activity, view a downloadable summary level statement, make an online payment, or sign up for a payment plan.
- Click Make Online Payment.
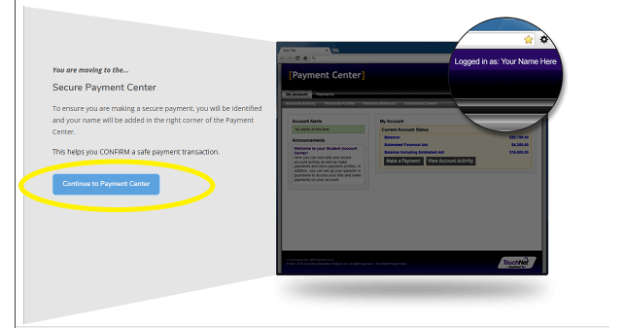
- Click Continue to Payment Center.
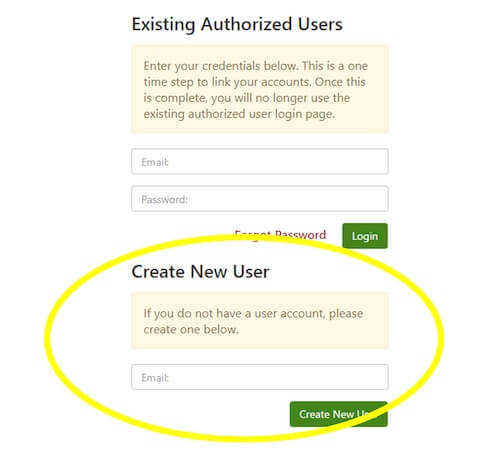
- In the Create New User box, enter the proxy's personal email address (NOT username). This is a one-time required step to authenticate the account to our payment vendor, TouchNet.
- At this point, if requested to log in again, close all browser windows and begin again with Self-Service with the username and the newly created password.
- Continue to Make Online Payments and enter the Payment Center without additional prompts to login.
For Additional Help With
- Logging into Self-Service: help@qu.edu or 203-582-4357
- Logging into the payment portal or making a payment: onestop@qu.edu or (203) 582-8650
- Setting up a payment plan: (833) 269-3675
- View the Self-Service Student Finance Guide (edu/selfserviceguide) for detailed instructions.
- You may wish to bookmark Self-Service (https://selfservice.quinnipiac.edu/student)
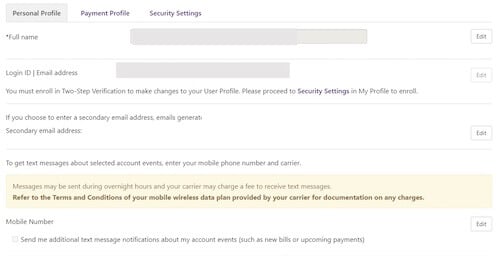
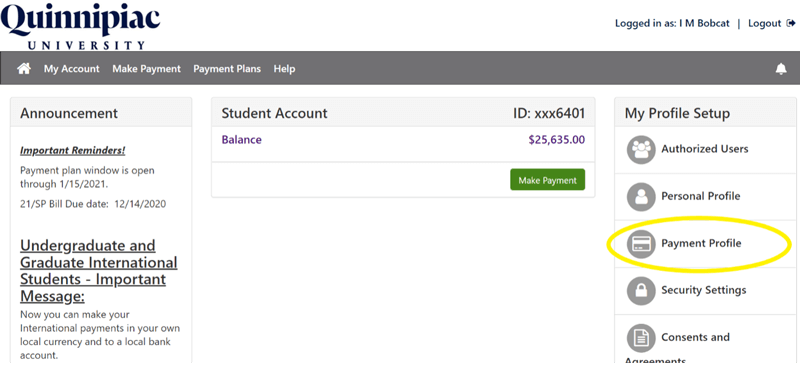
Quinnipiac University uses the vendor Touchnet® for online payments and payment plans. Touchnet® is accessed via Self-Service. The first time a student or their proxy logs in to make an online payment or set up a payment plan, they will be prompted to set up payment profile options. Additional options include text alerts, two-step verification, and the ability to save checking/savings account information for future payments. Changes to the profile can be made at any time, by clicking on the associated icon on the home page, under the My Profile Setup section.
-
Personal Profile: Verify pre-populated name, email address, and opt in for text alerts. Fields are editable if changes are needed.
-
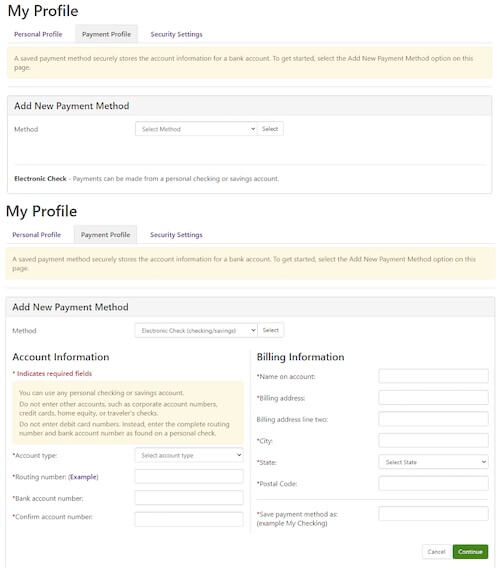
Payment Profile: Checking or savings account numbers can be saved for future use. Please note that not all savings accounts are eligible for use. Please confirm with your bank.
-
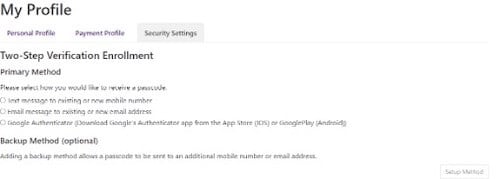
Security Settings: Set up two-step verification when logging in.
-
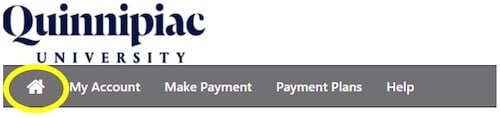
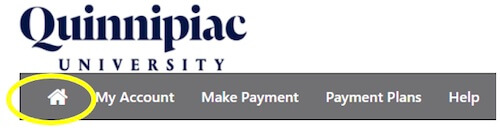
Click on the Home icon to make a payment or set up a payment plan.
All student term charges, relating to tuition, fees, and housing are available by logging into Self-Service Student Finance. The Student Statement provides a printable summary-level snapshot of a term’s charges, payments, and financial aid as well as a current course schedule. If mailing a check payment to the university, please include the top portion of the Student Statement along with the check. Please include the student's name and QU ID number in the memo line of the check.
-
Log into Self-Service with student QU credentials
-
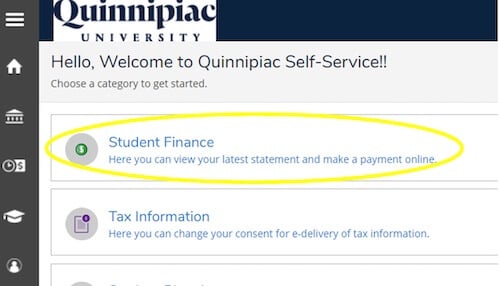
Click on Student Finance
-
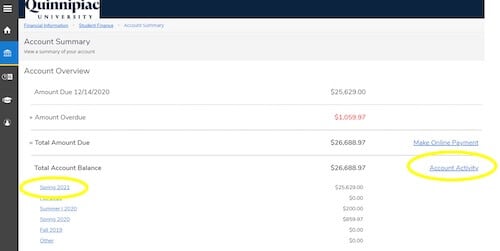
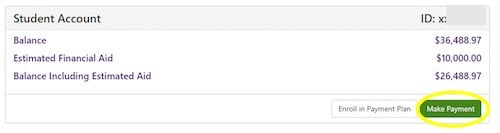
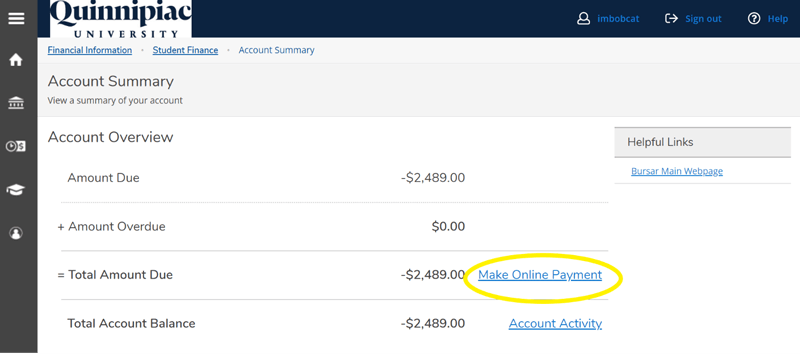
The Account Summary page will display the current overall balance due as well as any overdue balances and balances by term. To view account activity relating to a specific term, click on Account Activity. Alternatively, click directly on the term.
-
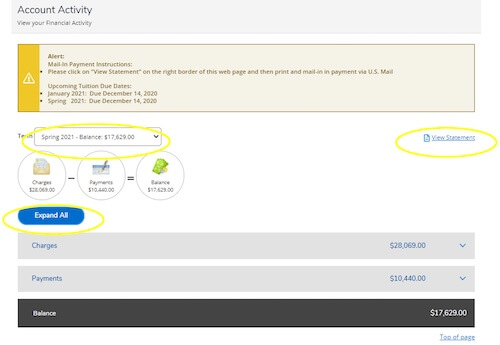
Select the desired term from the drop-down menu and click Expand All to view all term-based activity, such as charges, payments, and financial aid. Click View Statement to view a PDF downloadable version of the student’s account statement. The Student Statement will display only summary level activity. Detailed activity can be found by viewing Account Activity.
Students and authorized proxies can make single/full payments online, 24 hours a day, seven days a week. Online payment is made by automatic bank payment (ACH). Payments are recorded the day they are processed to ensure the most current Student Account balance in Self-Service.
Important: Before beginning, ensure browser allows for pop-up windows.
-
Follow Steps 1 through 3 of the Reviewing Account Activity and Viewing the Student Statement section
-
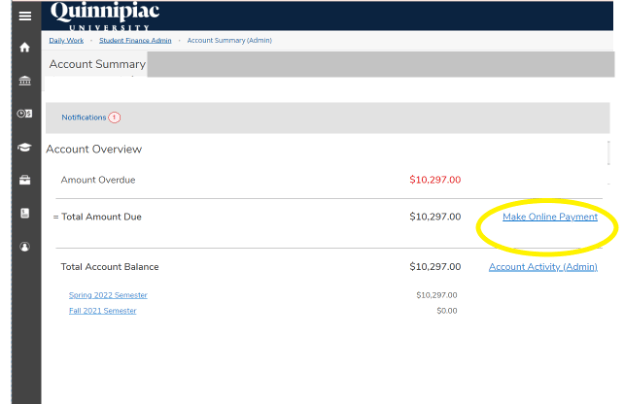
The Account Summary page will display the current overall balance due as well as any overdue balances and balances by term. Click on Make Online Payment.
-
Click Continue to Payment Center to begin securely processing payment
-
Click Make Payment
-
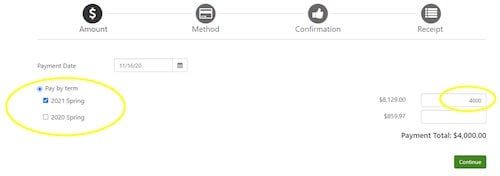
Select the term to pay and enter the desired dollar amount. Partial payments are allowed.
-
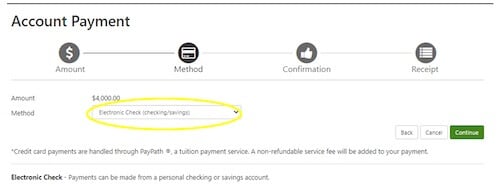
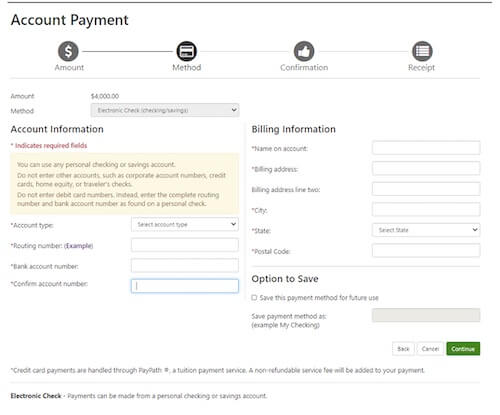
Select Electronic Check (checking/savings) and click Continue.
-
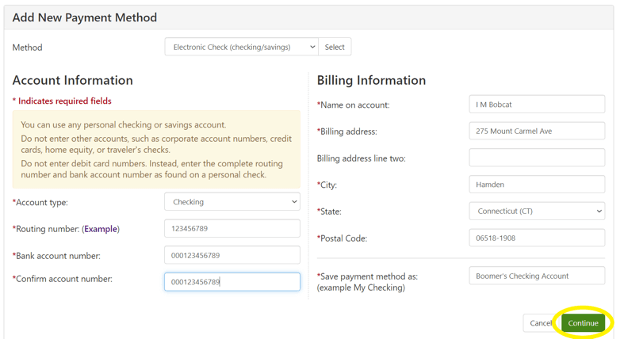
Enter the bank account information to use for this payment and click Continue.
Optional Note: Banking information can be saved on file for future payments by naming the account under the Option to Save section and checking Save this payment method for future use.
-
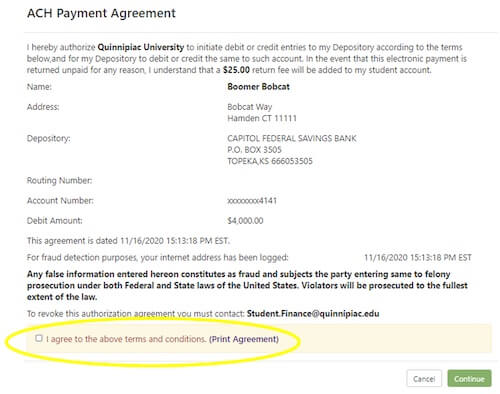
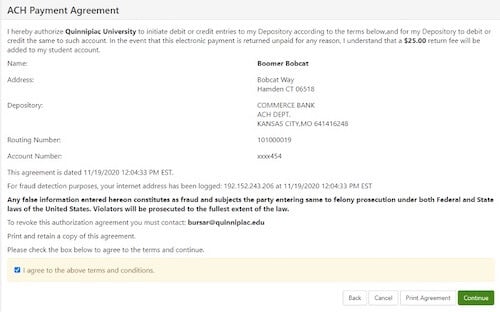
A pop-up window will display the ACH Payment Agreement. Review the agreement and if agreeable, click I agree to the above terms and conditions and Continue.
-
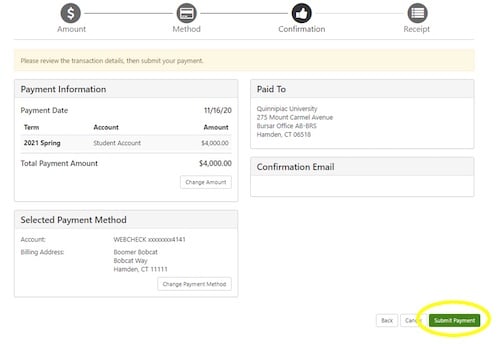
Review Account Payment and click Submit Payment.
-
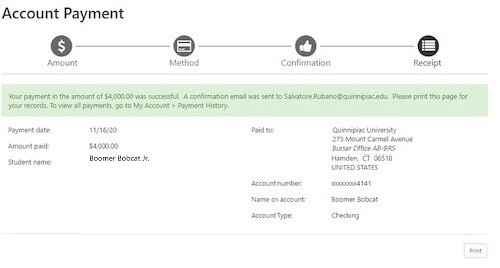
We recommend printing a receipt for record keeping purposes. An email confirming payment will also be sent. If an email is not received, check junk/spam folder. ACH payments post real-time to the student accounts.
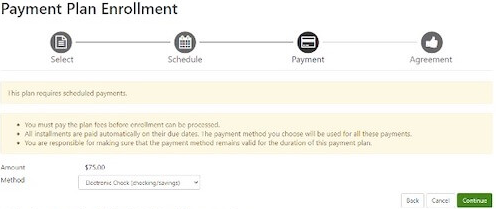
The university offers payment plans to help students meet educational expenses. These plans are available for the fall and spring terms on a semester basis and offer up to five (5) monthly payments per semester. Payment plans are not available for January and summer terms. The payment plan is not a loan program. There is no debt; there are no interest or finance charges assessed, and there is no credit check. The cost to budget the interest-free monthly payment plan is a $75 nonrefundable enrollment fee per agreement.
To enroll in a payment plan follow the steps below:
-
Follow Steps 1 though 3 in Reviewing Account Activity and Viewing the Student Statement section
-
Click on Make Online Payment
-
Click Continue to Payment Center to begin securely processing your payment.
-
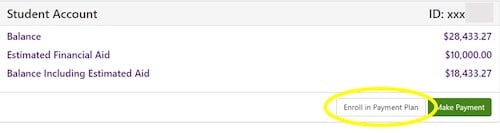
To set up a payment plan, click on Enroll in a Payment Plan.
-
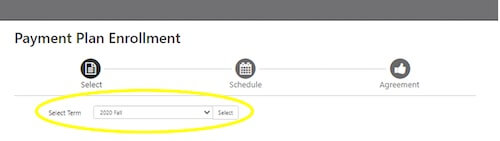
Select desired payment plan term and click Select.
-
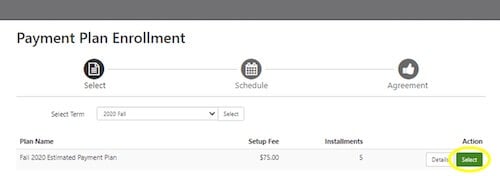
Click Select next to the payment plan to begin setting up the plan. Please note that most plans are estimated plans where the student or proxy estimates the amount owed after adjustments and financial aid. Changes to the amount after setup must be made through One Stop. Two different payment plans are offered. Please see the Payment Plan Types section for more information.
-
Payment plans are calculated by values that the student or proxy enters into the Eligible Charges and Credits Worksheet. Term based charges and financial aid can both be found in Self-Service Student Finance Account Activity. Be sure to include all expected Financial Aid (including pending outside scholarships) in the Financial Aid field. Optional down payments may be made on this worksheet as well. Enrollment fees and down payments are processed immediately. Once complete, click Update Schedule.

-
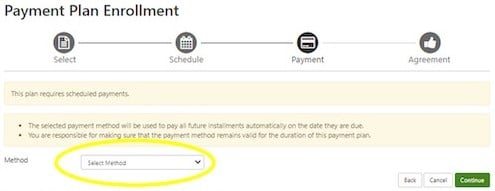
Select the payment method to use for all payment plan payments (and down payment, if applicable.) The payment method selected will be used for all monthly payments until the payment plan is paid in full. Note: If the payment method requires a change, please follow the Update Payment Method instructions.
-
Select Electronic Check and click Continue.
-
Enter the bank account information to use to schedule payment plan payments (and an any down payment). There is an option to save bank account information for future use.
-
Review the payment plan agreement that displays on the screen. Click the check box to agree to the terms and conditions. Click Continue to proceed.
-
Review the ACH Payment Agreement. Click to agree to the terms and conditions. Click Continue.
-
A confirmation page will appear once the payment plan set up is complete. Expect to receive an email outlining the payment plan payments. If an email is not received, check junk/spam folder.
-
Review future scheduled payments, by clicking on the Home icon at the top left of the page.
If a student wishes to edit or take away proxy access, the student should:
-
Log into Self-Service with QU credentials.
-
Select User Options, and click View/Add Proxy Access.
-
Under Active Proxies, click the pencil icon to Edit Proxy Access.
-
Under Access, click the appropriate option to Allow Complete Access, Allow Select Access and Remove All Access. If selecting Allow Select Access click the appropriate checkboxes for the specific access desired.
-
Click Save.
Follow the steps below if the student has an ACH scheduled payment via PayPath and wants to update to a different checking account.
-
Ensure that the browser is set up correctly by following ALL of the steps in the Web Browser Settings section.
-
Log into Self-Service with QU Credentials.
-
Click on Student Finance.
-
Click on Make Online Payment.
-
Click Continue to Payment Center to begin securely processing payment.
-
Click Payment Profile.
-
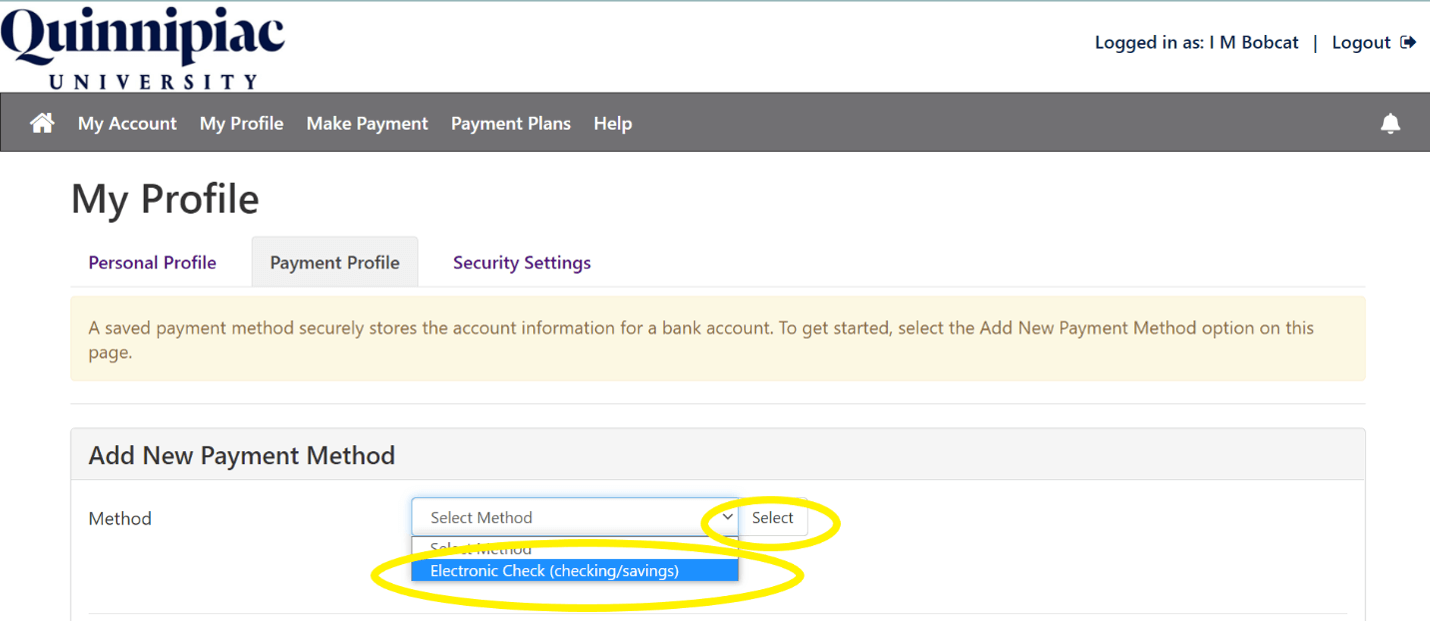
Under Add New Payment Method, for Method select Electronic Check (savings/checking). Click Select.
-
Enter the data for the checking or savings account and click Continue.
-
To select this account as the preferred account for a payment plan, edit the Payment Plan Scheduled Payment Method and choose the new ACH account.
-
Auto Adjust: This plan covers the student’s full balance due and will automatically adjust if the amount owed changes. When financial aid, additional charges, or adjustments are applied, the balance due on the payment plan will automatically adjust. This adjustment can lead to an increase or decrease of the monthly installments. The remaining balance due will be split among the remaining payments.
-
Fixed Balance (also known as estimated): This plan allows the student to determine the amount to pay via the payment plan. To make any adjustments to the amount, the student needs to contact the One Stop Office at onestop@qu.edu
-
International – Auto-Adjust or International – Fixed Balance: These plans function the same as the standard Auto‑Adjust and Fixed Balance options. The key difference is that they are designed for students who will use TransferMate to make their payment plan installments. International students will need to initiate the payment for each installment. If you are an international student unable to see the international payment plan options, please contact the One Stop Office at onestop@qu.edu